How to Permanently Delete Your WordPress Website (and Why You’d Want to)

Whether your business has closed, or you’ve started a new website from scratch, there are many cases where you might want to delete your WordPress website. While it’s relatively simple to achieve, removing it promptly and permanently from the internet requires some additional steps.
This post will tell you how to properly ensure that your self-hosted WordPress website is completely deleted. We’ll cover how to back up you site, delete your files, and remove your website from search engine results. However, before that, let’s look at why you would want to delete your site in the first place.
Why You Would Want to Permanently Delete Your WordPress Website
Permanently deleting your website means just what you think. It involves completely removing your content from the internet, and making sure your site is not accessible from any outlet. It may be that your business is closing down or merging with another, you’re moving your website to a different domain or starting anew, or it could even be an abandoned personal project.
Deleting your website files will mean that the site will be shut down, but removing it completely from the internet is a different story. There could be a wait between shutting down and search engines realizing that your site is inactive. Also, your webpages may be stored elsewhere, such as archive site the Wayback Machine – so if you don’t want a permanent trace to remain, this issue needs to be addressed too.
Don’t worry if it’s starting to sound complicated, we’ll cover all of these points in the next section.
How to Permanently Delete Your WordPress Website (in 3 Steps)
If you’re deleting your site, you’re no doubt looking for a quick and painless way to do it. Thankfully, it doesn’t involve a lot of work, and won’t take up a lot of your time. Here’s how to permanently delete your website in three steps.
Step #1: Back Up Your Website
Before doing something as drastic as deleting your website, it’s always prudent to create a backup. No matter how sure you are right now, you may need to access it in the future – even if it’s just as source of reference. Although there are a lot of backup plugins available, our recommendation is UpdraftPlus.
UpdraftPlus

With over 900,000 active installs, UpdraftPlus is one of the most popular WordPress plugins available. It can be used to back up, restore, or migrate your website, and offers multiple storage options such as Dropbox and Google Drive. There’s also a premium version, which offers additional features including a few more storage options.
Key Features:
- Offers quick restoration for files and database.
- Provides automatic scheduled backups.
Price: FREE
For full instructions on how to use UpdraftPlus you can check out our in-depth tutorial. However, once you’ve backed up your site, you can start the process of removing it.
Step #2: Delete Your Website’s Files With an FTP Client
While some self-hosted WordPress users can delete their files through their host’s cPanel, others don’t have that option. The simple solution method is to remove your site via a File Transfer Protocol (FTP) client. The one we recommend is FileZilla. If you’re new to using FTP, it’s worth getting up to speed with a good tutorial before moving ahead.
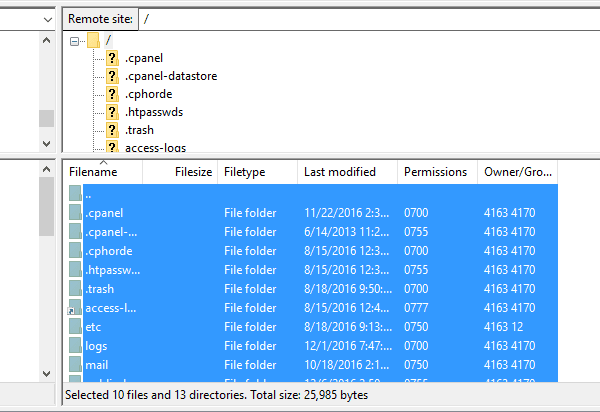
Once you’ve logged in using the credentials found in your hosting account, locate the domain you want to delete and simply select all of the folders and files associated with it:
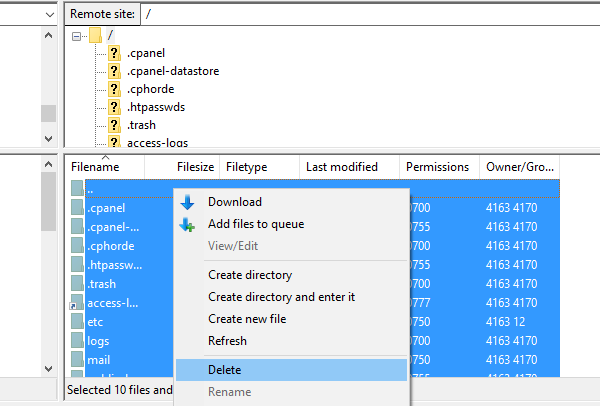
Then right-click, select Delete, and confirm:
While this step is super simple, ensuring that your site is completely removed from the internet is a little more complex.
Step #3: Remove Your Content from Search Engines
Even though you’ve deleted your website, search engines may continue to display your web pages in search results. Crawlers (also referred to as spiders, robots, or bots) from search engines such as Google and Bing access websites periodically and index their content. Once you’ve removed your site, it will take some time for the crawlers to communicate to the search engine that it no longer exists.
While search engines will eventually stop indexing your pages, there are various actions you can take speed up the process – Google also offers their own advice. Here are two ways to communicate to search engines that you no longer want your pages indexed.
1. Submit a Removal Request
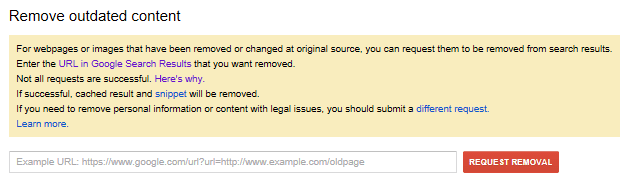
A removal request involves asking a specific search engine to remove your web pages from their search results. For Google you can request the removal of specific web pages using its dedicated tool. Simply enter the URL of the page you wish to remove, and hit the Request Removal button:
Of course, you’ll need to ensure that you have the correct URL according to their guidelines. If Google doesn’t remove the page, you’ll need to do some troubleshooting to find out why.
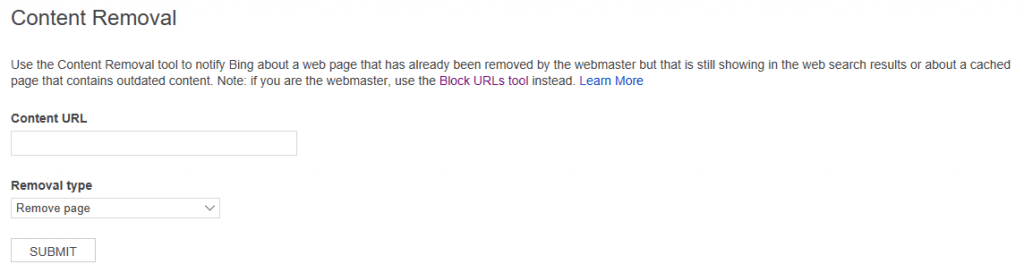
Similarly, Bing has a tool that enables you to request the removal of individual pages so they no longer appear in their search results. However, you do have to be logged into a Microsoft account to use this feature:
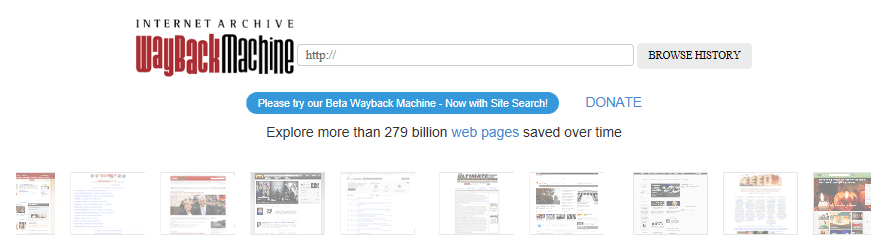
Finally, another site that could be listing your pages could is the Wayback Machine, which crawls and stores old websites. This archive currently houses over 279 billion webpages:
If you find your pages on the Wayback Machine and would prefer to have them removed, you can submit a removal request by emailing the company directly.
2. Set up a .htaccess File Redirect
Another way to tell search engines your site is no longer running is to set up a redirect in your .htaccess file. This is simply a WordPress configuration file that can alter the behavior of your server.
You can edit your .htaccess file a number of ways, including via your FTP client. The file should be in your root folder, which may be called public_html or www:

To set up a redirect, open the file and add the following line:
Header set X-Robots-Tag "noindex, nofollow" |
This header tag will apply to all pages of your website, and as a result will prevent search engines from indexing your site.
Conclusion
Deleting your WordPress website files is simple to execute either via your host’s cPanel or an FTP client. However, if your want to delete your website promptly and completely from the internet, there are some additional actions you should take.
In this article, we’ve talked about the best practices for permanently deleting your WordPress website. Let’s recap them quickly:
- Back up your website.
- Delete your website’s files using an FTP client.
- Remove your content from search engines, either by manually requesting their removal, or via a .htaccess redirect.
Do you have any tips for permanently deleting a WordPress website? Let us know in the comments section below!